A Little Love

Is it February already? January flew by me in a blur – last I checked, it was New Years. Honestly, each month seems to fly by until mid August and slows down to a snail’s pace until October. I’m really not a big fan of  the back to school season.

Another Valentine’s day is just around the corner. I know for some, it’s just a reminder that they aren’t in a relationship, but as a child, my mother did all that she could to make us see the holiday as one about the love we have for those in our lives. We always got a sweet gift to wear, like a pin or necklace or earrings, and a bag of treats. I may not have had a lot of friends or ever a boyfriend on the holiday, but I always felt loved.

These days, I have a quiet night with the Hub s. Dinner at home (usually something we rarely have, like flank steak) and a movie, away from the hullabaloo at the restaurants. We don’t do big presents, but we focus on the love we share for each other and for our daughter.

Because this life really isn’t about the gifts or the cards – it’s about the relationships we have with the people around us.

So, as my Valentine’s gift to you, my dear readers, I designed a desktop calendar.  Just a little something to help you feel the love this month 🙂 Enjoy!

{click to enlarge & download}

Tasty & Healthy Cookie Dough?

To start, I just have to say that I am madly in love with my food processor. How in the world did I live with out it??

*ahem*

Back to the topic on hand.

A few years ago my Mom introduced me to Larabars, a gluten free, all natural nutrition bar.  I wasn’t super excited about them at first, even if it is super hard to find any kind of energy/nutrition bar that is gf, but I was turned off by the dates. Can you blame me for thinking they look like candied roaches? Anyway, I tried one (must have been the apple pie flavor) and aside from feeling like the flavor was really intense, I loved that one bar kept me full for a long time. As time has gone on, they’ve introduced different flavors and I’m totally sold. But I can’t afford the yumminess on a regular basis. So they’ve been strickly vacation/road trip food.

Until I saw Sheena’s post. Homemade larabars? Oh hannah, those I can do.

Using what I had on hand (and with a little help from the larabar website), I made up my own, 4 ingredient chocolate chip cookie dough bars & brought them with me to Church on Sunday. (I totally felt like a hippie, what with our switch to cloth diapers, more on that later, and our homemade snacks. Please slap me if I start hugging trees.)

The Bean ate one whole one in 1 minute. I was impressed.

The Hubs took one to work and wasn’t starving at lunch time.

I knew  I had a winner.


So here, it is:

Chocolate Chip Cookie Dough Snack Bars

1 cup dates, chopped

1 cup cashews, chopped

1/2 c bittersweet Ghirardelli chocolate chips

1/4 c Cuittard’s Choc-au-lait chips

**Now, if you are like me, you’re going to want to add salt to this. Don’t! For this particular flavor, no salt is needed. I added a little bit with my first batch and it was faar too salty.**

Place all ingredients in a food processor and chop until mix becomes a paste. Line a loaf pan with saran wrap (or wax paper) and place mixture in pan. Spread as evenly as possible and place a piece of saran wrap on top, then take a second loaf pan and press mixture flat. Remove second loaf pan and gently lift pressed mixture onto a cutting board. Cut into 1″ strips and wrap seperatly with saran wrap. Enjoy!

Makes 8 bars


Good Things To Come

Oh sweet little blog, with your few followers, I do have some fancy ideas for you this year.

Numerous tutorials, patterns and shameless plugs for my etsy shop are in the works, as are a few other ideas.


But here is the teaser of what to look forward to:

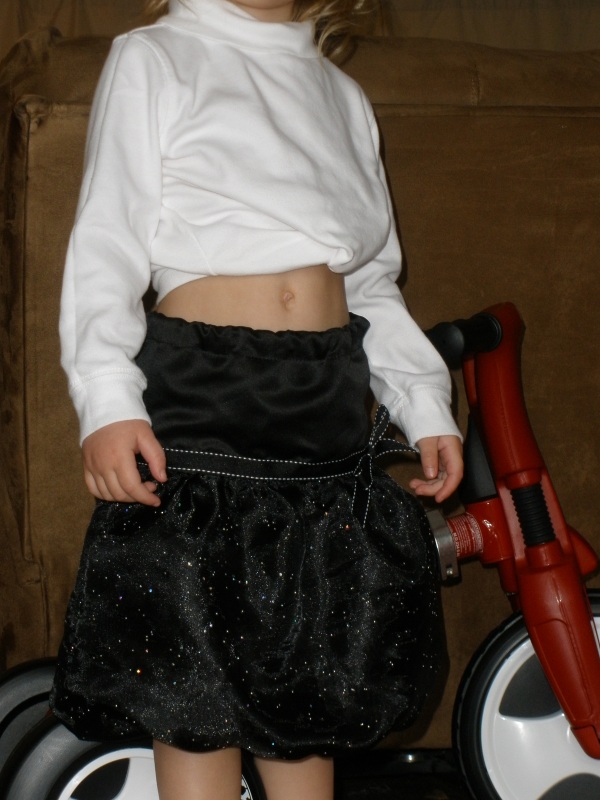
a toddler sized bubble skirt

ain’t it just so cute?

Happy New Years

Or as we like to call it:

Happy Bean’s Day!

That’s right, our little Bean’s birthday is the first of January. No, I didn’t get anything special for pushing her out – a set of twins beat her to being the first baby of the new year at our hospital. But she’s still just as special as if she had been. She’s such a light in our lives! Just don’t tell her all those balloons that came down from the ceiling at the party last night weren’t for her birthday…..

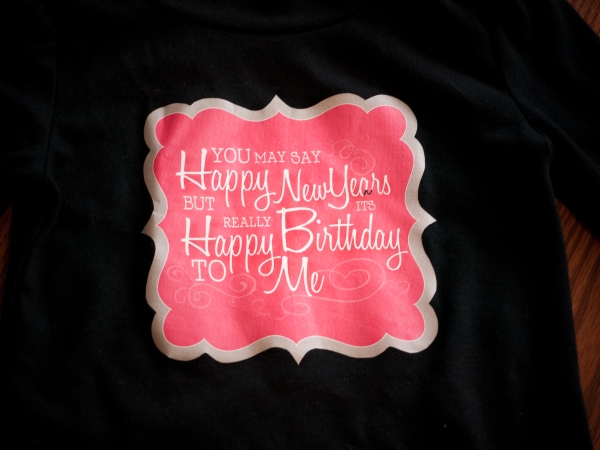
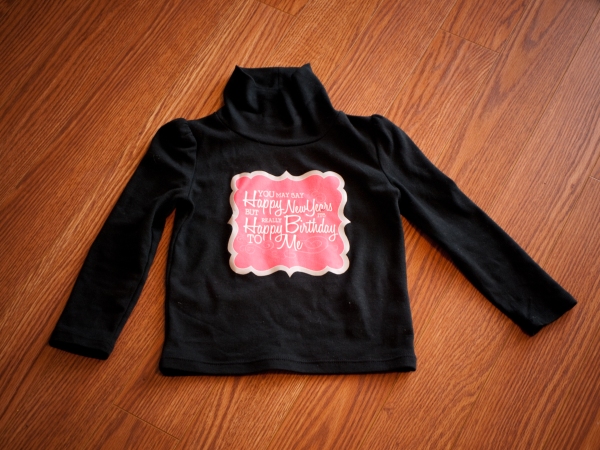
Here’s the shirt I made for her to wear to the party.  (I used Illustrator and a computer print out iron on.) Of course I forgot to save the file in Illustrator and then dumb old Windows decided to update and reboot, thereby leaving me with no file of my work…. Ah well. At least the shirt survived and I think I can recreate it, if needs be.

Oh, Photoshop & Lightroom, how I love thee

Admist the Christmas prep (my sewing room is litterally covered in projects at the moment, if I wasn’t so proud, I’d snap a picture to show y’all), I edited this picture in Photoshop and then in Lightroom. Yes, I know Photoshop does the same thing as Lightroom. I just prefer Lightroom, but there are a few things I cant do with it.

Anyhoo, my sister in law had a photo of her Hubby and herself that she really liked, but the background was awful.  So she asked me if I could fix it and after looking at it, I knew I could.

The ugly yellow:

The perfected photo:

I used a few adjustment layers in Photoshop, coloring the background blue, then coloring the shadows to match, and fixing a few of the outlines. Then in Lightroom, I used a few of my presets (I love. love. love presets)  to get the brightness right and to create that pretty dark around the edges feel.  All in all, a pretty fun & easy fix. Now a marginally good photo is display ready!

Tis the Season

Happy December! This is my favorite time of the year, and also the busiest around our house. Not only do we have two more holidays (yay!) but we have two birthdays smack in the middle of both Christmas and New Years. It adds some extra crazy to my already crazy holiday prep, but I love it.

Since my Christmas shopping is all but finished (everyone aside from the Hubs and Bean are getting hand made items this year), I’ve had some extra time to craft and design.  So, my etsy shop is updated with two new hair accessories and two Christmas photo cards to help you guys check some gifts off your lists! Yay!

I’ve had a few people ask about what age group the headbands are for and my response is, any! There’s no reason for little girls to have all the fun, so adults, teens, kids, anyone can wear my headbands. I haven’t successfully made the crochet ones for babies yet, but the flowers themselves can be ordered with just a clip so they can go on a baby headband.

First up is the Clementine headband, which you may remember from my previous post. I also made one in orange and I can put them on clips, too, so if you want another color or it on a clip, just send me a message on etsy.

Second is the Grace Headband, which can also be made as a clip. Sorry folks, it only comes in off white right now, but once I get my lazy derrier up to civilization, I’ll be adding a few more colors. This sweet headband I made on Thanksgiving morning to make my other wise drab outfit feel a little more fancy for the holiday. I can also put both the Clemintine and the Grace on a stretchy headband for little babies, if you are looking for a gift for a younger sweetie pie.

Now for the cards: one is the Manny and the other is the Berry. There we originally designed for a contest, which I didn’t win (sad), but now you all can order them for your own use. Just drop your photo in and print them off at Costco or Shutterfly. Super easy. They come in 5×7, 4×6, and 6×7.

Check out my shop eviesbeans.etsy.com, where you can also find my oh so cute crocheted headbands, too!

Babies are such a great way to start people

A good friend of mine is having a baby girl in February. She’s actually the sister of the Hubs’ best childhood friend, whom I was on a date (of sorts) with when I met the Hubs. And whose mother was my coworker at Barnes and Noble and takes credit for my marriage, since she set her son and I up, leading to the “date” on which I met the Hubs. And my friend married a good friend of the Hubs and her brother/the childhood best bud. Follow? Good. Anyways, love that girl and am so excited for her to be a mommy. And dying to find out what her name will be (they are keeping it a secret).

So excited, in fact, that I whipped up this little sundress number for the bundle of joy to wear next summer, using B3405 .

The fabric is from an old dress of my sister-in-law’s, of which I totally forgot to snap a picture. Think this (which is actually the dress, but chopped short), but with this length skirt. I have more than enough fabric left over to make a dress for Bean.

The cotton eyelet lace is from my Mom’s amazing stash (she and I have an affinity for the stuff). As are the buttons which of course I forgot to take a picture of. Geeze, I really dropped the ball on picture taking with this project, didn’t I?? Just picture cute white buttons down the back. Anyways, I love the fabric with the lace – gives it a feminine feel with out all the pink or heinous purple.


I just can’t wait to see the little squishy she-whose-name-will-not-be-said in this number next year!

Living Room Update

So, since we painted our livingroom/tv room/converted garage box of a room a lovely shade of green, I have yet to decorate.  We rearranged furniture and that’s about it. I know what I want to do with the room, but our budget is not allowing for any kind of decorating at the moment.  One day I’ll be able to buy new curtains, or cheaply update our boring tan ones, get a wood curtain rod to match all the others in the house, and get stuff to put on the walls. Maybe a few bookcases/storage thingies. At least my furniture works!

These are my inspirations:

this room found in House Beautiful. Oh how I adore that fabric!


– these topiaries from New Moon (yes, scoff and mock, but one can find inspiration anywhere) in Bella’s birthday scene. They are amazing.

Twilight New Moon


Now, as I said, my decorating budget is nill, so buying silk flowers is out of the picture. Sad, huh? But right now all my extra income is going to Christmas presents (so buy headbands so I can buy a gift for my husband :).

However, today, via How About Orange, I figured out how I’m going to make my own versions of the topiaries.  This tutorial + paper doilies + glass vases = awesome cheap topiaries.

Or at least, I hope so. Here’s to hoping I can find some vases, like these from Pier 1, for cheap!

Moved!

After being more than annoyed at blogger for a while, here I am on wordpress. There’s a bit of a learning curve, so it may take me a bit to get everything looking the way I want it to.

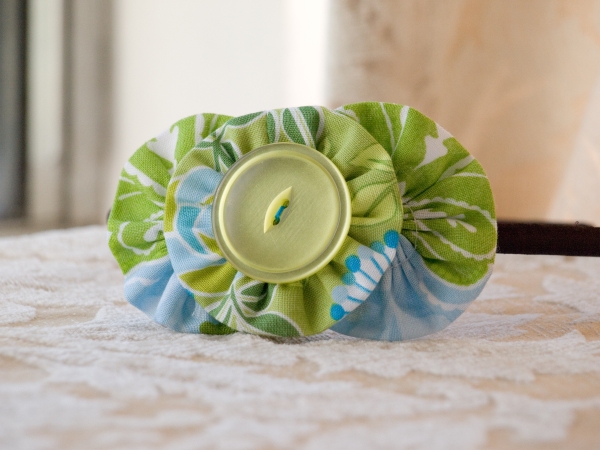
Anyways, the other day I saw some fabric flower headbands on etsy (speaking of which, go check out my shop and place an order – my headbands make great stocking stuffers!), I decided I must make one of my own.  It’s such a great use for all those scraps I have lying around and who doesn’t like adding a little spunk to a plain t and jeans outfit (aka – the momiform)?

I used the same idea behind my flower-tshirt embellishment, but folded the strips in half length wise, to keep the edges clean. Then I had then ends meet, forming a circle. Not too hard, but a little time consuming. I also made it so I could remove it from the headband. I’m not sure if my felt will hold up after multiple removals, so I’ll have to perfect the idea before trying to say that I came up with a great idea to have interchangeable headbands 🙂 Cause I don’t know about you, but I really don’t like having a gazillion plastic headbands laying around – they are sooo hard to store.

I think it turned out pretty cute. Cute enough to add to my etsy store? We’ll just have to see…

It’s Open!

Photobucket
My etsy shop is up and rolling! Right now, I just have a few headbands up, but I’m working on getting a lot more  up for sale in the next bit. Go and check it out! eviesbeans.etsy.com